Friday, November 29, 2013

Breakfast at Tiffany's Party

Here is the sweetest 1st birthday party I had a BLAST designing and styling! It was also featured on Hostess with the Mostess!!


HERE ARE THE PARTY DETAILS AS TOLD ON HOSTESS WITH THE MOSTESS:
The theme of this party was based off of Breakfast at Tiffany’s, but we changed it to Breakfast at Lola’s (the birthday girls name). Instead of going with the traditional accent color of silver we did everything in GOLD.
– The children’s tables were set up as a Kings Table on little mini 6 fts and then of course had little mini kid chivari chairs in white with white chair pads. Petite Party Studio made custom name tags that were then attached to the back of each chivari.
– At each place setting there was either a tiny tiara or a wax mustache depending if you were a girl or a boy
– The gold glittered bottles were a DIY project. They were french lemonade bottles that I covered in mod podge then rolled in glitter. Then Petite Party Studio created the 2% and Chocolate Milk labels for them.
– The french milk cups for each child were another DIY project. All I did as take double sided tape and put a ring at the bottom of each one and then dipped those in glitter just to add a little something extra.
– Gum ball pearl necklaces: I took a giant doll sewing needle and threaded the ribbon through the gum balls to make DIY pearl necklaces.
– The ends of the wooden utensils were each all dipped into glitter as well for more sparkle.
– The black frame backdrop was an old mirror that broke. Then I had the Audrey quote done on a printable and blown up at Costco for 11.00 and hung it with fishing line.
– Another EASY DIY was I cut diamonds out on my silhouette and just stuck them into white ring powdered donuts to look like diamond rings.
– Custom napkins were printed with an Audrey Hepburn quote.
– The birthday girl had 2 older brothers so they of course had Security shirts made that read SECURITY in Tiffany Blue on the front and “We guard the bling and the girl” on the back.
– A custom balloon arch was made to frame the wall that the kids table was by to add a touch of whimsy.
– As guests entered they were asked to write a prayer or a wish to Lola and then put it in her Lola & Co. box. At then end of the party we sealed the box shut with wax, and we will now give it to her on her 18th birthday.
– After everyone had brunch and we sang Happy Birthday the kids got to swing away at the “Audrey” piñata.
CREDITS:
– Event Styling & Planning: Sassy Soirees Wedding & Event Planning
– Custom Party Hat & Tiffany’s Box for Prayers & Wishes: Paper Princess Studios 
– Tassel Garland & Tassel String for Large Balloon: The Flair Exchange
– Custom Printables, Invitations, Straw, Paper Goods, Milk Jugs: Petite Party Studio
– Photographer: A Dude and a Chick Photography
– Big Brother Security Shirts: MonMell Designs
– Lola’s Little Black Dress: Atutudes 
– ONE Sign on Buffet: Pink Paisley Designs 
– Custom Oreos: Wise Girls Creations
– Custom Piñata: Whack Pinateria
– Custom Sugar Cookies: Fresh Cut Flours
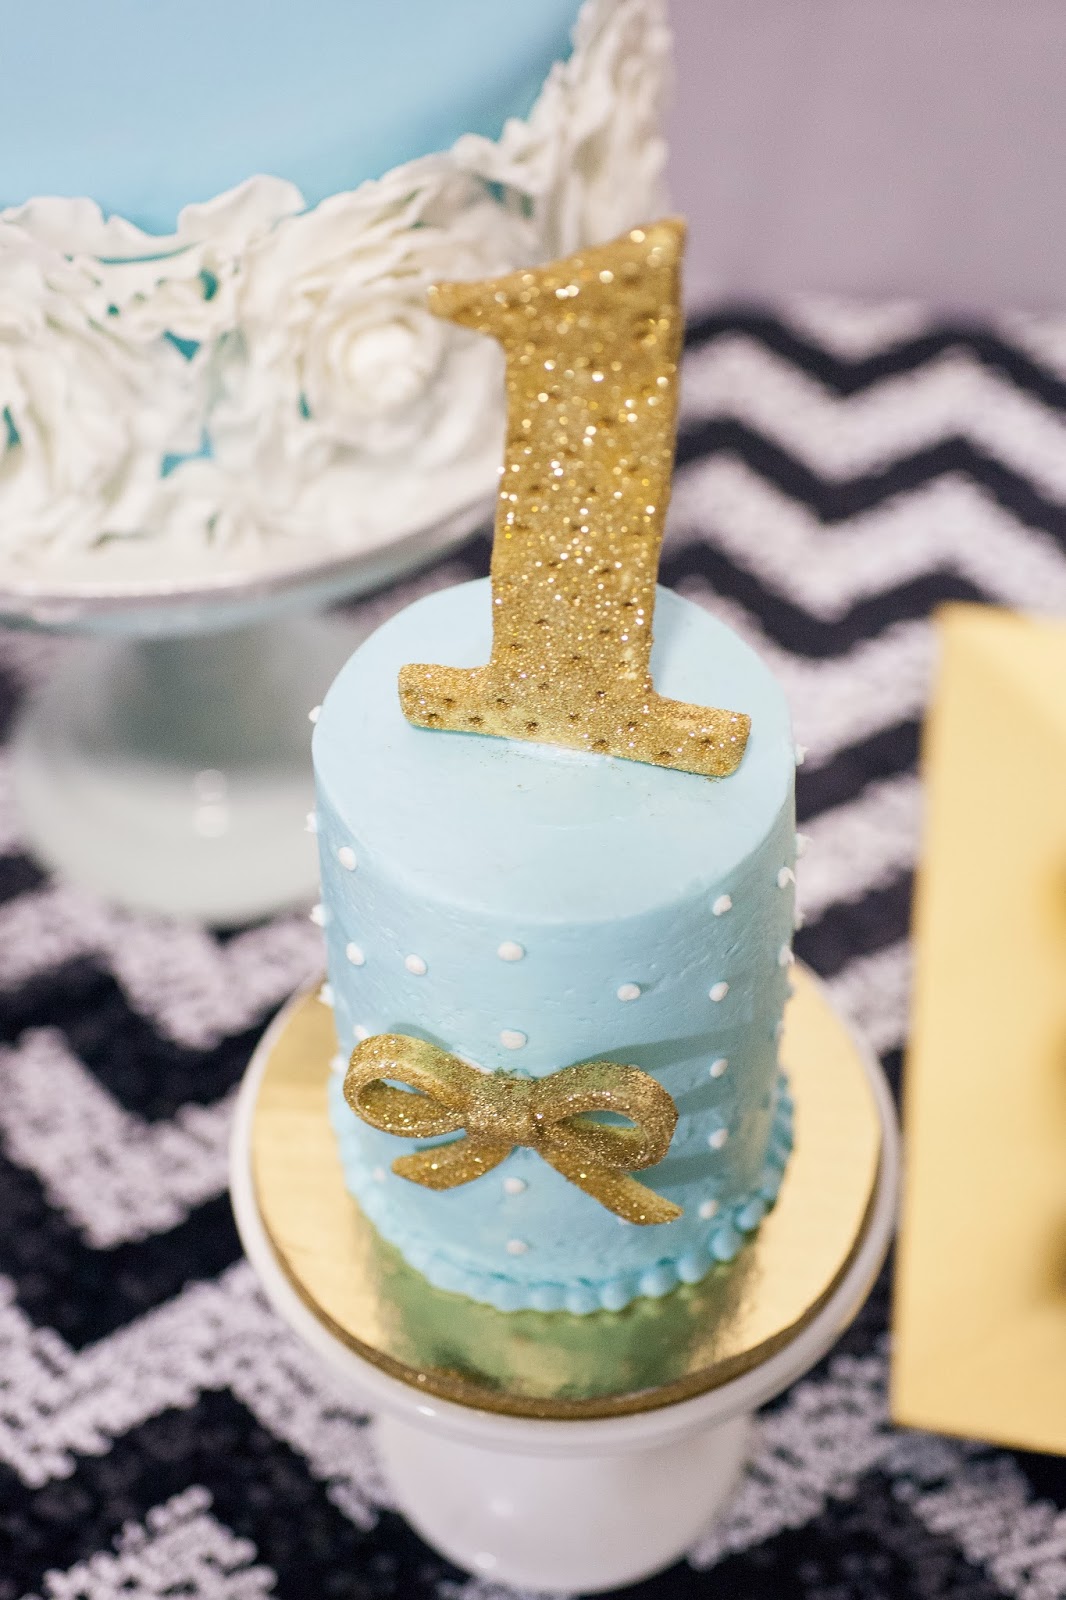
– 2 Cakes & Fondant Toppers: BayBee Cakes
– Smash Cake & Cake Pops: Lily Whites Party  Cakes
– Rentals: Classic Party Rentals
– Floral Arrangements: Lux Florist 
– Linens: La Tavola

Tuesday, October 1, 2013

PLEASE GO TO INSTAGRAM FOR ALL RECENT WORK

Our site and business is starting the process of re-branding so our real web site is currently not up so for all recent updates of what we have been up to around here please see instagram under @SASSYSOIREES!!! We look forward to working with you--the tabs at the top still explain the current wedding packages.

Have a HAPPY DAY!!!

--Shannon

Friday, September 20, 2013

How to paint the frame of your TV!

Finally--Here is what we did to get my mounted TV GOLD for the new Sassy Office!!! *FYI if your husband or significant other looks at you like your INSANE that is the 1st step and your off in the right direction!!!
 
 *Yes the cords are going to be hidden:)

Here is our TV before we started...
1st we laid it down flat with the screen laying on carpet--then all the screws were taken out
Even though all the screws were removed there were still wires that connected the frame to the TV that easily came undone.
Yes this was scary--I just prayed the TV would work after we put it back together lol
Next we sanded down the high gloss frame
Taped up a few wire connectors that were on the inside of the frame
My husband then had the GENIUS idea to place toothpicks in the holes where the screws go to hold the frame up elevated so it could get a good even spray
Those 2 circles are just stickers (1 is actually a rhinestone lol) that I placed over the sensor area so they would not get paint on them and they kept a good clean circle outline
Next it got a good coat of primer
After that dried came the GOOD STUFF

Honestly it was a pretty easy project! I normally do not post DIY tutorials so let me know if I didn't answer all your questions, and happy painting!!!

Friday, August 9, 2013

How to make a road for your next Car Party!

I know I know I have been the worse blogger ever, but I am in the middle of having all my stuff re-done and so I have not even wanted to blog til we had our new look. However, after I posted a picture of the road I made for my sons NASCAR party on instagram (@sassysoirees) my email blew up for a tutorial--so here we are!!! Let me start by saying that this was thrown together in a day, and is SUPER easy, and super CHEAP!!!
Supplies:
Black plastic table cloths
White printer paper
Black duct tape
Scissors

Steps:
-Lay out your rectangle table cloth and cut lengthwise in half (do this on however many depending how long a road your making)
-Lay them out where you want them to go and tape them down
-Then cut rectangles out of your computer paper 
-Tape those every 6 in or so

For the NASCAR made out of cardboard I simply went to a local beer distributor who is a NASCAR sponsor and asked if they had any advertising props I could borrow--and what do you know they had this AWESOME car!!!


What did I tell ya--EASY PEASY, and your 5 year old thinks your the most AWESOME mom ever!!!

Tuesday, January 29, 2013

Michelle & Derek